 There are always large questions to answer when thinking about creating an interactive work: Who is it for? What does it look likes? What are you trying to communicate? How much instruction do you provide, how little instruction do you provide? And on and on. As I started to think about how this piece was going to work as an installation rather than as a performance apparatus, I started by thinking about what kind of data I could use to drive the visual elements of this work. One of the sensors that I knew I could easily incorporate into my current sculptural configuration was a an iPod Touch. The Touch has an on-board gyroscope and accelerometer. After a conversation with my adviser (Jake Pinholster) we decided that this would be a direction of exploration worth pulling apart, and from there I went back to TouchDesigner to start thinking about how I wanted to incorporate live data into the piece I was making.
When dealing with a challenge like building an interactive sculptural system that has at least three different visualizations, it can be challenging to think about where to start. Different programmers are bound to have different approaches to addressing this question. My approach was to start by thinking about what kind of input data I had to work with. Because I was dealing with a sensor that relayed spatial information, this also help me think about how to represent that data. Next I thought about what different kinds of ways I wanted to present this information, and finally I addressed how to playback this experience for users. Some of my more esoteric and existential questions (why am I making this? what does it mean? what does it represent?) were addressed through the methodical programming process, and others were sussed out over contemplative cups of coffee. As much as I wish that these projects could have a straight line of execution, a checklist even, I'm discovering more and more that the act of creating and programming is often a winding path with happy (and unhappy) discoveries along the way.
My first step on this journey, however, was to address what kind of inputs I had to use. Hexler has an excellent app for sending UDP messages over wireless connections called Touch OSC. OSC, or Open Sound Control, is a communications protocol that uses UDP messages to send data over wired and wireless networks. It's functionally similar to MIDI and has some additional flexibilities and constraints. In the case of touch OSC, one of the parameters that you can enable from your iOS device to send xyz data from the accelerometer. Getting Touch OSC up and running does require a few steps to get the ball rolling. First both the computer that's receiving and the device that's broadcasting need to be on the same network. Your broadcasting device will need the IP address of the receiving computer, and a specified port to send the data to (how to find your IP address on a Mac, and on a PC). Once this information is set on your broadcasting device, it's time to add a Channel Operator to your TouchDesigner network.
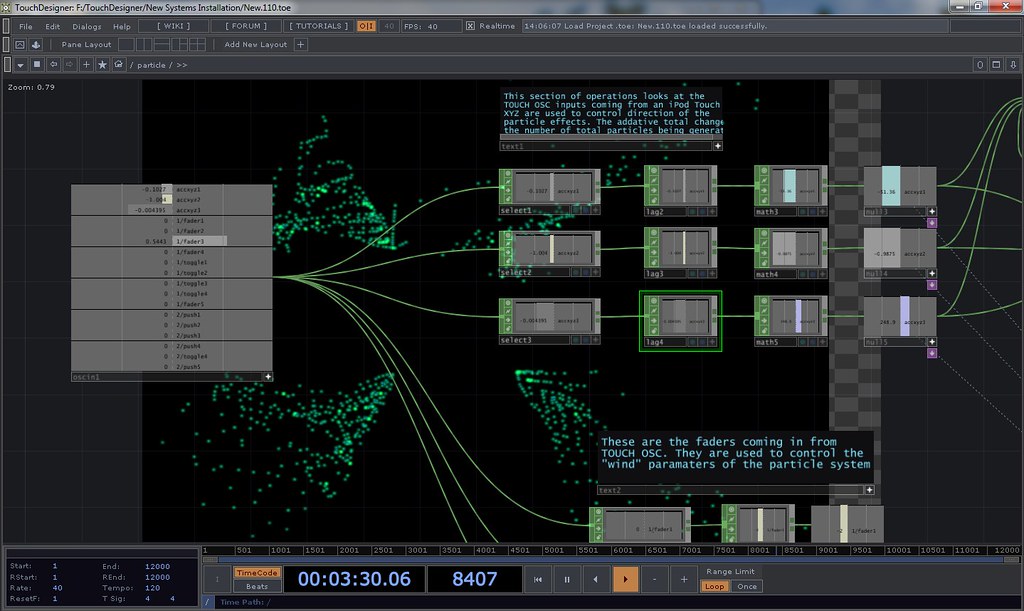
In TouchDesigner, there is a CHOP called "OSC in." This CHOP will allow you to receive OSC data over a wireless network. Once you've added the CHOP to your TD network you'll have to specify the port that Touch OSC is broadcasting to, and then you should be in business. In my case once this was set up I could instantly see a stream of accelerometer data coming from my iPod Touch. In order to use these values, however, I needed to take some additional steps. The raw OSC data from Touch OSC comes in as a range of data from -1 to 1. Additionally, the data comes in from one CHOP. My flow of operators looks like:
OSC In - Select - Lag - Math - Null
OSC In is the data input. The CHOP Select allows you to select a single channel out of a bundle of channels. In this case I used this to separate my X, Y, and Z inputs into different streams. The Lag chop helps to smooth out the attack and decay rates of input data. In my case this ensured that my final values used to control another object where kept from being too jittery. The Math CHOP is tremendously powerful, in my case I wanted to be able to map the values of my raw data [ -1 to 1 ], to a larger range of values, say 0 to 200. Finally I ended my string in a Null. A null in this case is very useful in case I need to add any other operators into my string.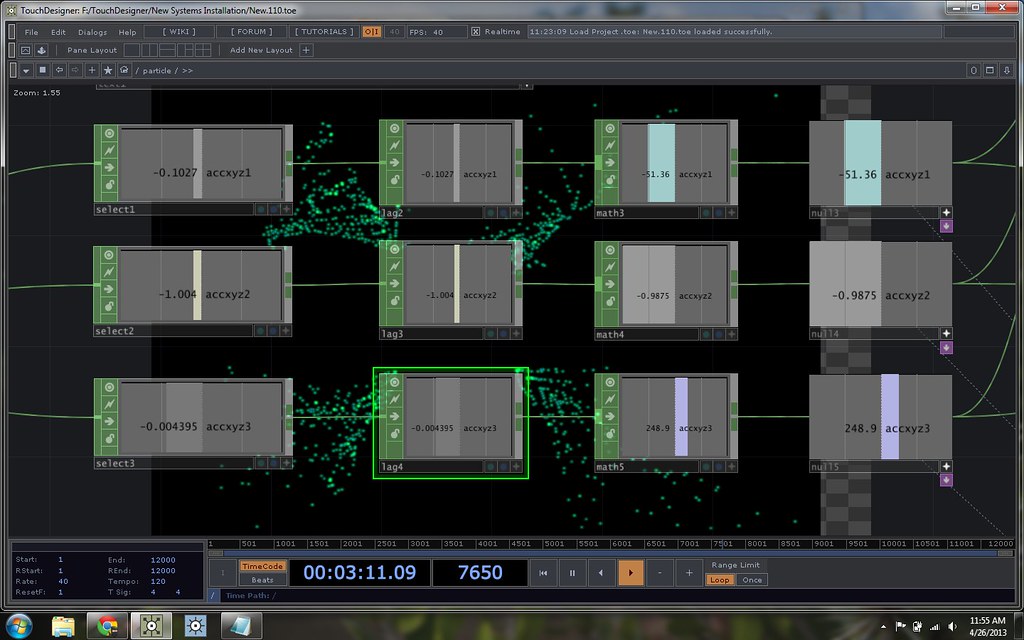
Before thinking about how to use these values, it's important to take a moment to revisit how geometry is rendered in TouchDesigner. The geometry COMPs that are used to create the objects to be displayed can't be visualized without using a render TOP. The render TOP requires three components in order to generate an image that can be seen. Render requires a source geometry, light, and camera. The Geometry COMP provides the location of surfaces, the light provides the necessary information about how the object is being lit. The camera COMP controls the perspective that the object is being rendered from. This is similar to an approach that one might use when creating 3D content in After Effects - an object to be rendered, a light so the object can be seen, and a camera to control the perspective the audience sees of the object. Because we need to think of rendering by combining multiple COMPs, that can inform how we use live data.
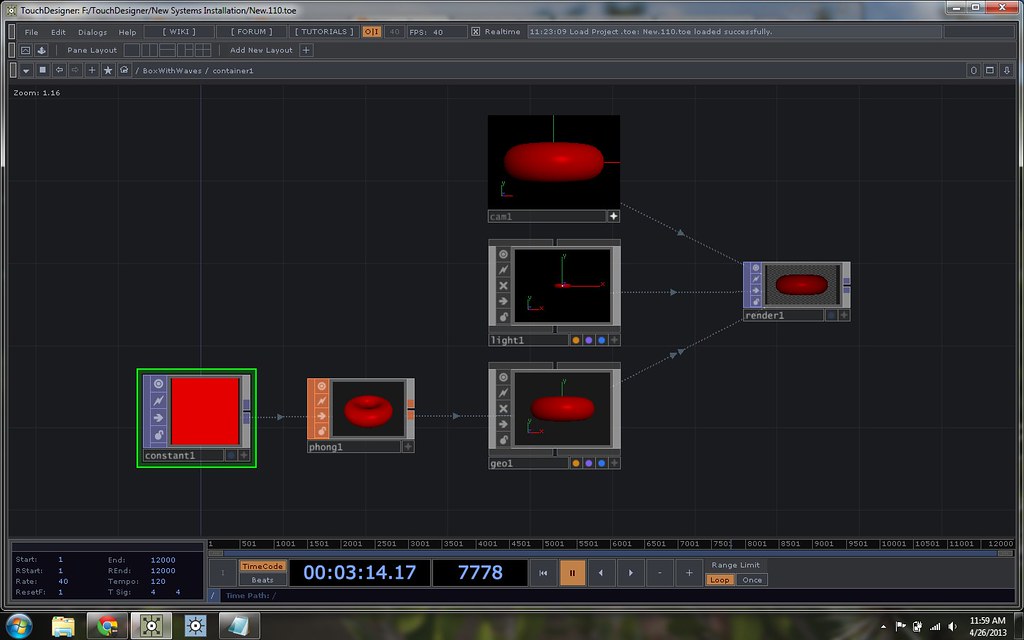
With some scaled values process and ready to export I was ready to think about how these values could influence the viewers perspective of the geometry. One of my initial thoughts was to render a cube that a user could look inside of. As the observer changed the orientation of the sensor, the virtual environment would also change in kind. While it's possible to do this by rotating and translating the geometry itself, I instead decided to focus on the orientation of the camera instead. This has a few advantages. One important advantage is the ability to tell a camera to look directly at a specified geometry. This means that in translating the camera (left or right, up or down, in or out) the camera stays focused on the center of the target geometry. This makes changing perspective much simpler.

Initially I was thinking of rendering the entire 3D scene as a single geometry. In doing this, however, I was experiencing some challenges when thinking about the placement of lights and the overall organization of the geometry, and in applying texture to the surfaces. By using a Phong shader one can apply texture maps to the 3D geometry COMPs that have been created. By separating the interior and exterior pieces of the geometry and then compositing them after rendering I was able to apply different shaders to each geometry.
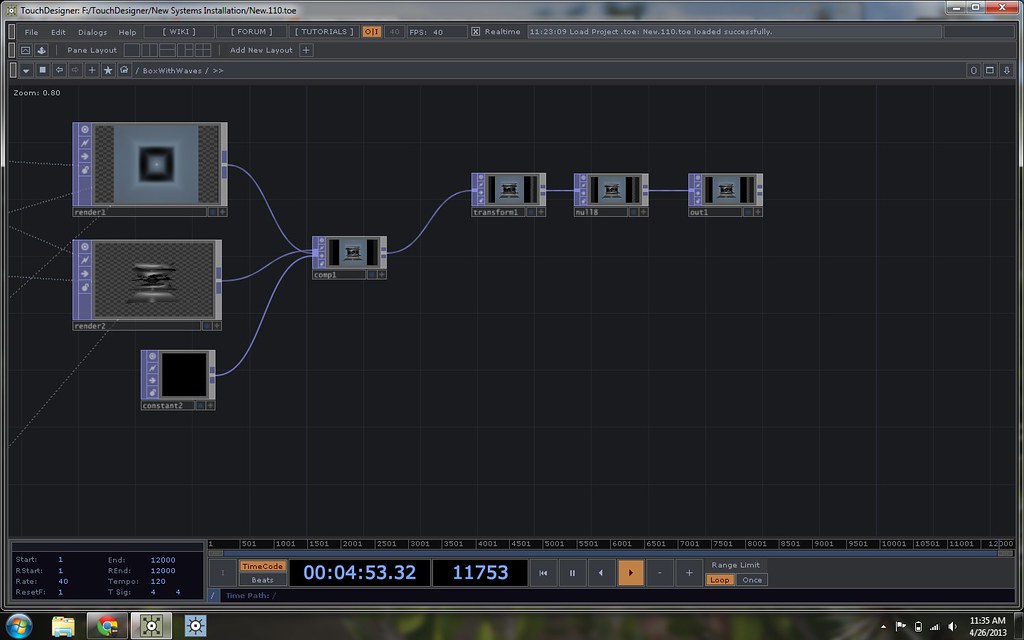
The portion of my network responsible for compositing the geometry looks like this:
Render 1, Render 2, Constant (black solid) - Composit - Transform - Null - Out
Render 1, Render 2, and the Constant are the three source surfaces. Render 1 is the box, Render 2 is the merged set of waves, and the Constant is a black background. Another approach to this would be to set one of the camera background's as black. These three flow into a Composit COMP. Next is the Transition COMP (this allowed for some small adjustments that needed to be made in order to help align the projection with the sculpture. Originally I made this string with a Null as the final output of this Component. I would eventually find that I needed an Out to pass this scene into another display module.
I used the same techniques as above for the other two scenes - starting with establishing my data stream, generating the geometry, rendering out layers to be composited and then passed out to the visual stream.
Are these pictures too small? You can see higher quality versions by looking at this Flickr Gallery: Graduate School Documentation
Are these pictures too small? You can see higher quality versions by looking at this Flickr Gallery: Graduate School Documentation