Holy challenges Batman. It seems like I'm constantly being humbled by the learning curve of graduate school. This spring one of ASU's productions is Charles Mee's Soot and Spit.

Soot and Spit is grounded in the work of James Castle, an artist who was deaf and possibly autistic. One of the most powerful outlets for expression in Castle's life was making art. He made countless works over the course of his life, and one of the mediums that he used was a mixture of soot and spit. With this as a contextual anchor the lead designer, Boyd Branch, was interested in exploring the possibility of using particles as a part of his final design.
One of my charges in working on this production was to explore how to work with particles in Isadora (our planned play-back system). I started this process by doing a little digging on the web for examples, and the most useful resource that I found as a starting point was the Mark Coniglio (Isadora's creator) example file. Here Mark has a very helpful breakdown of several different kinds of typical operations in Isadora, including a particle system. Looking at the Particle System Actor can feel a little daunting. In my case, The typical approach of toggling and noodling with values to look for changes wasn't really producing any valuable results. It wasn't until I took a close look at Mark's example patch that I was able to finally make some head way.

Let's get this party started by making some conceptual plans about how we want to experiment with particles. I started by thinking of the particles as being emitted from a single source and being affected by gravity in a typical manner, i.e. falling towards the ground.
Here's my basic particle emitter set-up for this kind of setup:
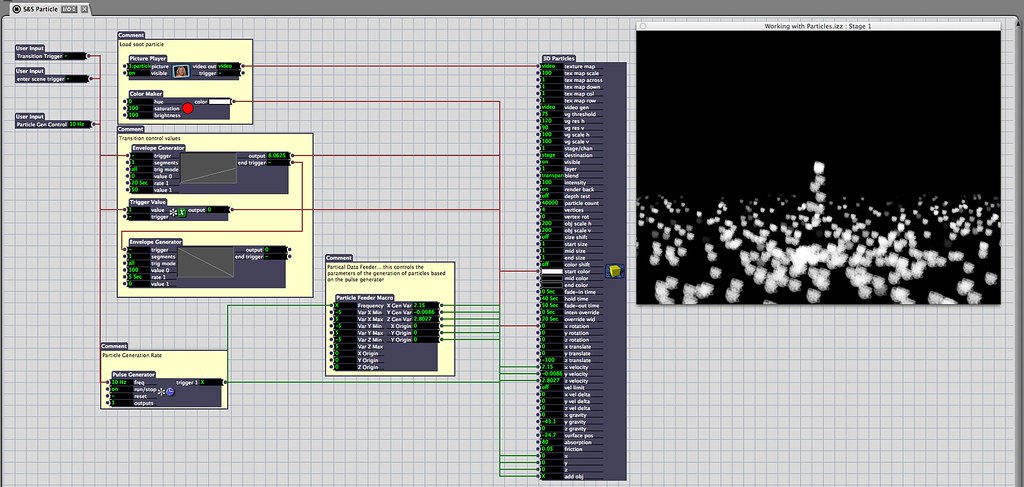
Let's start by taking a look at the things we need to get started. As I mentioned before we need to start by frist getting a pulse generator set-up. Let's start by adding a pulse generator, and looking at where it's connected:

Here we can see that the pulse generator is hooked up to a custom user actor that I've called "Particle Feeder," and to the "Add Obj" attribute in the 3D particle Actor. This approach is making sure that we're only using a single pulse generator to bang on our particle system - pushing attribute changes and add object changes.
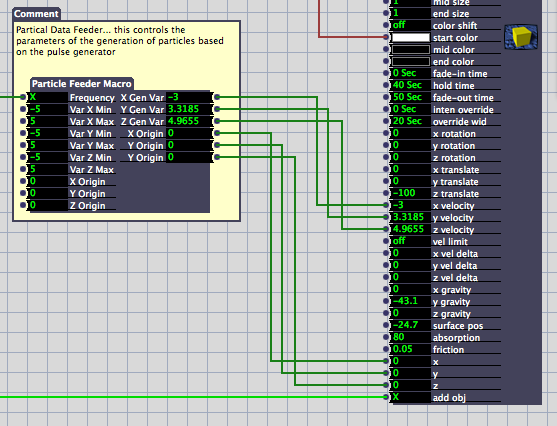
Next let's look at the Particle Feeder actor that I made to make this process easier:
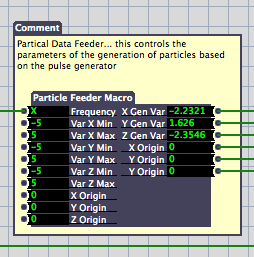
Inside of this custom actor we see this:
At first glance we can see that we have four blocks of interest for this actor. First off it's important to notice that our Frequency input is passed to all of our modules. The first three modules are copies of one another (one for X, Y, and Z). We can see here that our pulse generator is banging on a random number generation actor, that random value (from 0 to 100) is then passed to a Limit-Scale Value actor. The limit scale actor takes an input value in a specified range and scales it to another range. In our case it's taking values between 0 and 100 and scaling them to be between -5 and 5. The resulting value is then passed out of this macro to it's corresponding value. Our bottom block pushing out data about our emitter location. It's important to remember that we need to pass out the origin location for each particle that's generated. This is why the location information is passed through a trigger value that's being triggered by our systems pulse generator.
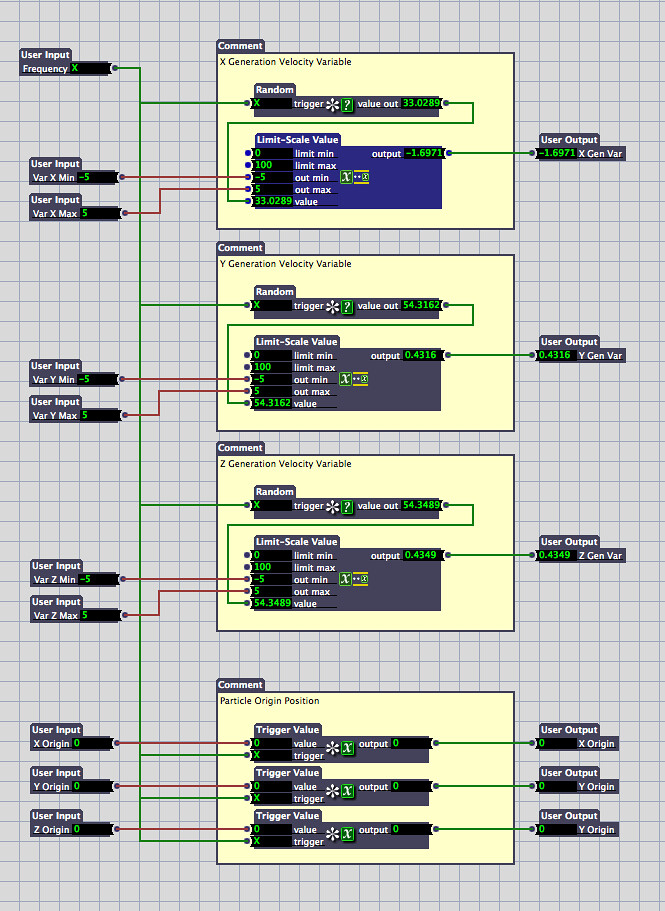
If we jump back out of our user actor can see how our input parameters are then passed to the 3D particle actor:
Ultimately, you'll need to do your own experimenting with particle systems in order to get a firm handle on how they work. I found it useful to use custom actors to tidy up the patch and make sense of what was actually happening. I think the best way to work with particles is to get something up and running, and then to start by changing single attributes to see what kind of impact your change is making. If you're not seeing any changes you may try passing your value through a trigger that's attached to your pulse generator - remember that some attributes need to be passed to each particle that's generated.
Are some of these pictures too small to read? You can see larger versions on flickr by looking in this album: Grad School Documentation.
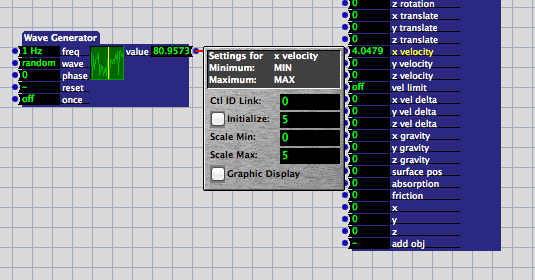
One of the great joys of sharing your work is the opportunity to learn from others. John Collingswood (for more about John check out dbini industries and Taikabox), pointed out on Facebook that one of the very handy things you can do in isadora is to constrain values by setting the range of an input parameter. For example, I could forgo the min-max system set-up with my user actor and instead scale and constrain random values in the 3D particle input. When you click on the name of an input on an actor your get a small pop-up window which allows you to specify parameters for that input's range and starting values. This means that you could connect a wave generator (with the wave pattern set to random) to an input on a 3D particle actor and then control the range of scaled values with the 3D particle actor. That would look something like this: