Buttons are very handy interface controls. Before we get started, it’s important to cover a few considerations about how buttons work. When working with a physical button, like an arcade button on a midi controller, the action of pressing the button completes a circuit. When you release the button, you also break the circuit. In Isadora, we can control what happens when we press a button. Specifically, we can control what values are being transmitted when the button isn’t being pressed, when it is being pressed, and how the behaves (does it toggle, or is the signal momentary). Thinking about how a button behaves will help as you start to build an interface, simple or complex.
Let’s start by experimenting with a simple implementation of this process. We’ll create a white rectangle that fills our stage, connect our shape to a projector, and finally use a button to control the intensity of the projector.
Start by creating a new scene, and adding a “Shapes” actor and a “Projector” actor. Connect the shapes’ video outlet to the projector’s video inlet.
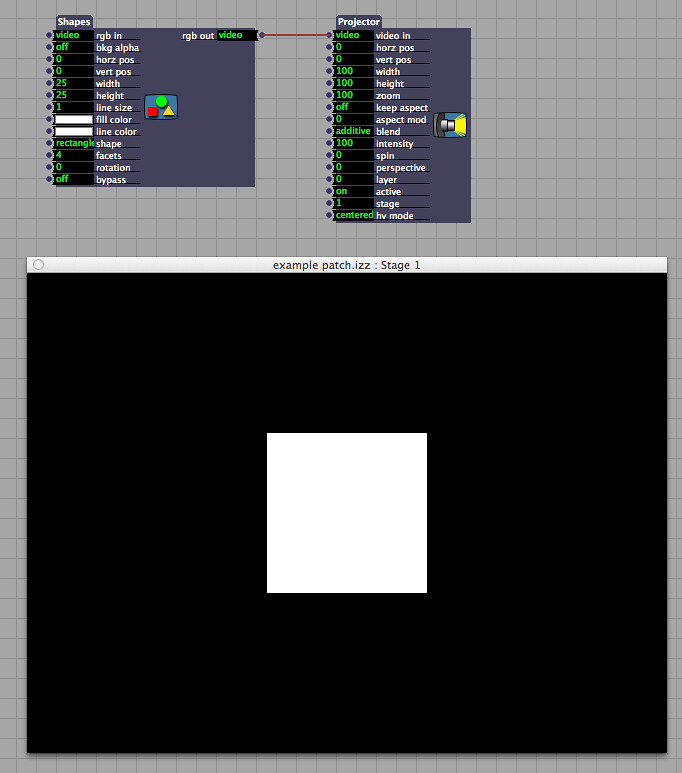
Next change the width and height dimensions of the shape to be 100 and 100 respectively. Remember that Isadora doesn’t use pixel values, but instead works in terms percentage. In this case a value of 100 for the hight indicates that the shape should be 100% of the stage’s height, the same applies for the width value of 100.

We should now have a white box that covers the height and width of the stage so that we only see white.
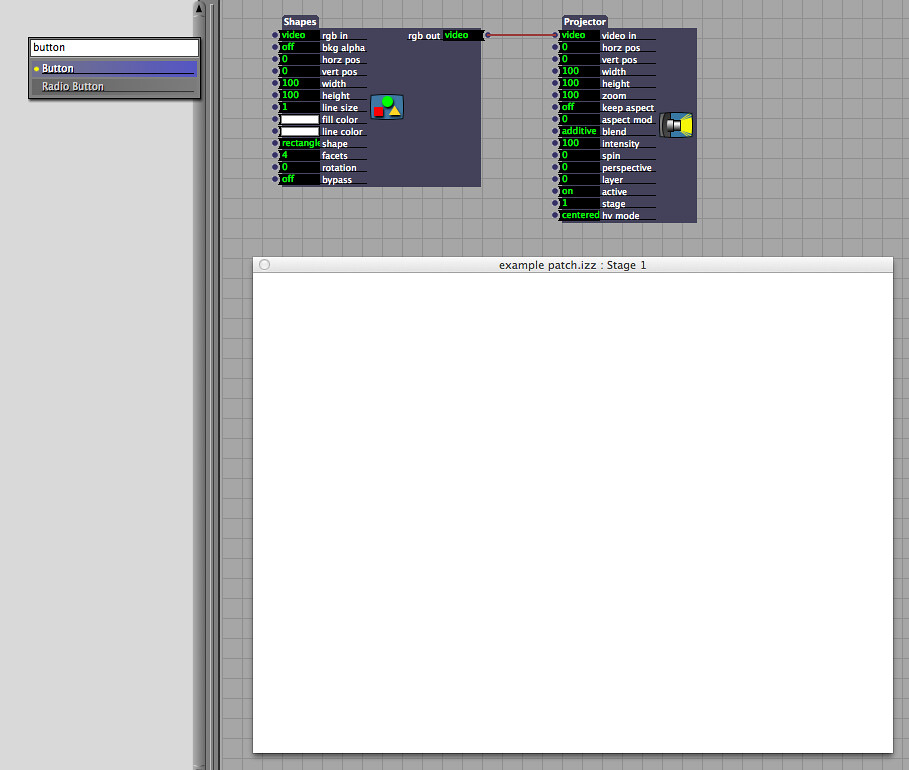
Now we’ll use a button to control a change in the stage from white to black. Remember that in order to start adding control elements we first need to reveal the control panel. You can do this by: selecting it from the drop down menu use Command-Shift-C to see only the control panel or use Control-Shift-S to see a split of the control panel and the programming space. If you've turned on the Grid for your programming space you'll be able to see a distinct difference between the control panel space (on the left) and the programming space (on the right). You'll also notice that with your Control panel active your actor selection bins have been replaced by control panel operators.
With the control panel visible, add a button.
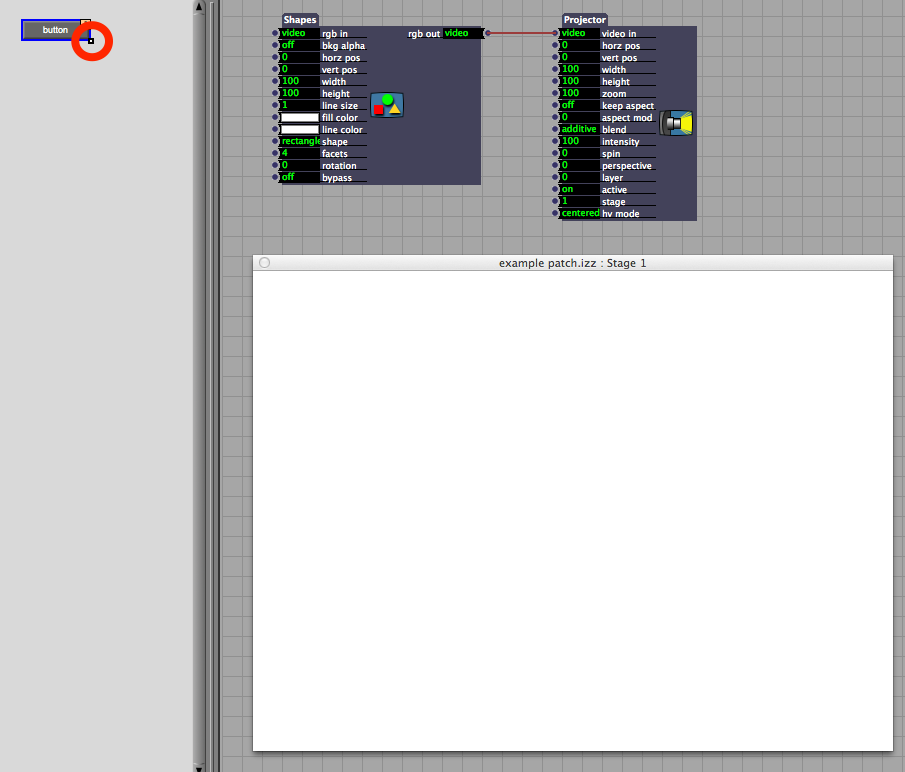
Once you’ve added your button to the control panel, you can change the size of the button by clicking and dragging the small white square on the bottom right of the button.
Next let’s look at the options for the button. We can see what parameters we can control by double clicking on the button. When you do this you should see a pop up window the the following attributes:
- Control Title - what the control is named
- Width - how wide is this control (in pixels)
- Height - how tall is this control (in pixels)
- Font - the font used for this control
- Font Size - self explanitory
- Show Value of Linked Properties - this allows data from the patch itself to feed back into the control panel
- Button Text - the text displayed on the button
- Control ID - the numerical identification number of this contorl
- Off Value - the numeric value sent when the button is in the off position
- On Value - the numeric value sent when the button is in the on position
- Mode (Momentary or Toggle) - the mode for the button. Momentary indicates that the on value is only transmitted while the button is being pressed. Toggle indicates that the values with toggle between on and off values with a click.
- Don’t Send Off - prevents the button from sending the off value
- Invert - inverts the on and off values
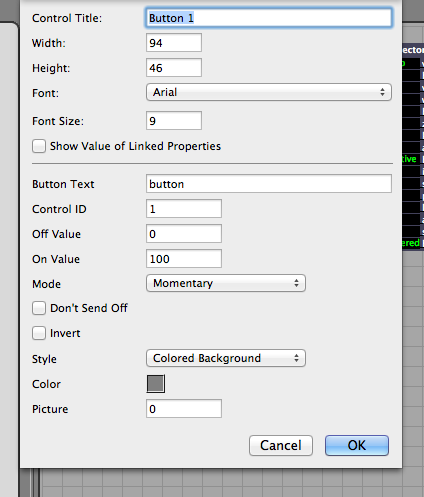
There are a few other options here, but they mostly have to deal with the appearance of the button. When you start thinking about how you want your control panel to look to an operator, these last parameters will be very helpful.
For right now let’s leave the default parameters for the button’s options. Next connect the button’s control ID to the inlet on the Projector labeled “intensity.”

As we’re working on the control panel our edit mode is currently enabled which will prevent us from being able to actually click the button with the mouse. To check the controls we have two options:
We can disable edit mode by right clicking on the control panel work space and selecting “Disable Edit Mode” from the contextual menu.
We can use the option key to by-pass the above process.
If you’re doing some extensive testing of your control panel I’d recommend that you disable edit mode. On the other hand, if you’re only testing a single slider or button, I’d recommend using the option key as a much more efficient alternative.
Holding down the option key, you should now be able to click the button in the control panel. You should see the white box flash on, and back off again as you press and release the mouse button. Right now as we click the button we’re sending a value of 100 to the intensity parameter of the Projector actor. This makes the shape opaque only so long as you’re pressing the button.
Double click the button in the control panel and check the box for “Invert.” We’ve now inverted the message being sent from the bottom to the Projector. When you click the button you should now see the opposite. A white screen that flashes black, and then returns to white.

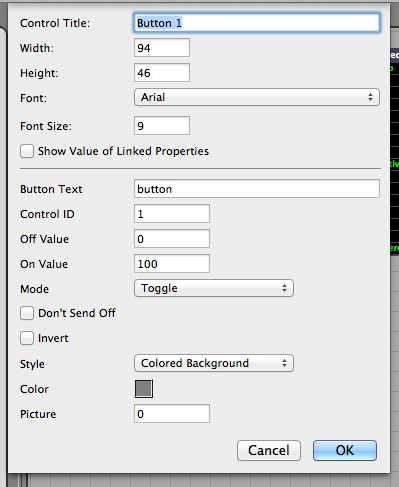
Double click on the button in the control panel, uncheck the box for “Invert.” Change the “Mode” of the button from “Momentary” to “Toggle.” Now as you click the button you should notice that it stays depressed until you click it again. This allows you to toggle between the on and off states of the button.
This, obviously, is only the beginning of how to work with Buttons. You might use a button to control the play back of a movie, what media was on the stage, the position of media on a stage, to jump between scenes, or to change any number of parameters in you parch. Knowing the basics of how buttons behave will help ensure that you can start to build a solid control panel that you can use during a live performance.
