IDM Log
Tuesday, May 21, 2013
House of Escher | Media Design
In December of 2012 I was approached at an ASU School of Theatre and Film party and asked if I would be interested in working on a project that would begin the following semester, and premiere a new work in the Fall of 2013. As this is exactly the kind of opportunity that I came to ASU to peruse, I eagerly agreed to be a part of the project.
Some Background
ASU's School of Theatre and Film (soon to also include Dance) has a very interesting graduate school program for performers and designers. Operating on a cohort based system, the school admits a group of performers, directors, and designers (Scenic, Costume, and Lighting) every three years. One of the other graduate programs at the school, the one in which I'm enrolled, can enroll students each year. My program, Interdisciplinary Digital Media and Performance (IDM), straddles both the school of Arts, Media, and Engineering as well as the School of Theatre and Film. Students in my program have pursued a variety of paths, and one skill that's often included in those various paths is media and projection design for stage productions. Just today as I was watching the live web-cast of the XboxOne announcement, I was thinking to myself, "some designer planned, created, and programmed the media for this event… huh, I could be doing something like that someday."
The latest cohort of actors, designers, and directors started in the Fall of 2011, which means that the group is due to graduate in the Spring of 2013. In both the second and third year of the cohort's program they work to create a newly devised piece that's performed in one of the theatre's on campus as ASU. Occasionally, this group also needs a media designer, and it's their new show for 2014 that I was asked to be a part of.
The Fall of the House of Escher
Our devising process started with some source material that we used as the preliminary research to start our discussion about what show we wanted to make. Our source materials were Edgar Allen Poe's The Fall of the House of Usher, M.C Escher, and Quantum Mechanics. With these three pillars as our starting point we dove into questions of how to tackle these issues, tell an interesting story, and work to meet creative needs of the group.
One of our first decisions focused on the structure of show that we wanted to create. After a significant amount of discussion we finally settled on tackling a Choose Your Own Adventure (CYOA) kind of structure. This partially arose as a means of exploring how to more fully integrate the audience experience with the live performance. While it also brought significant design limitations and challenges, it ultimately was the methodology the group decided to tackle.
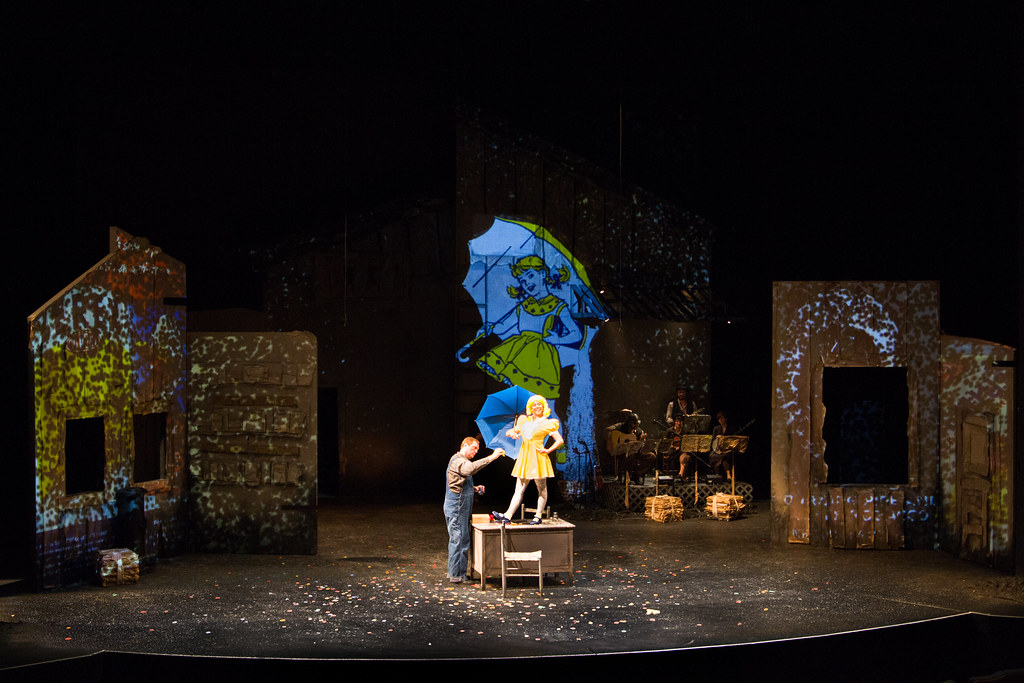
Shortly after this we also settled on a story as a framework for our production. Much of our exploratory conversation revolved around the original Poe work, and it was soon clear that the arc of the Fall of the House of Usher would be central to the story we set out to tell. The wrinkle in this simple idea came as our conversations time and again came back to how Poe and Quantum Mechanics connect with one another. As we talked about parallel universes, and the problems of uncertainty, we decided to take those very conversations as a cue for what direction to head with the production. While one version of the CYOA model takes patrons on the traditional track of Poe's gothic story, audience members are also free to send our narrator down different dark paths to explore what else might be lurking in the Usher's uncanny home. Looking at the photo below you can see where the audience has an opportunity to choose a new direction, and how that impacts the rest of the show.
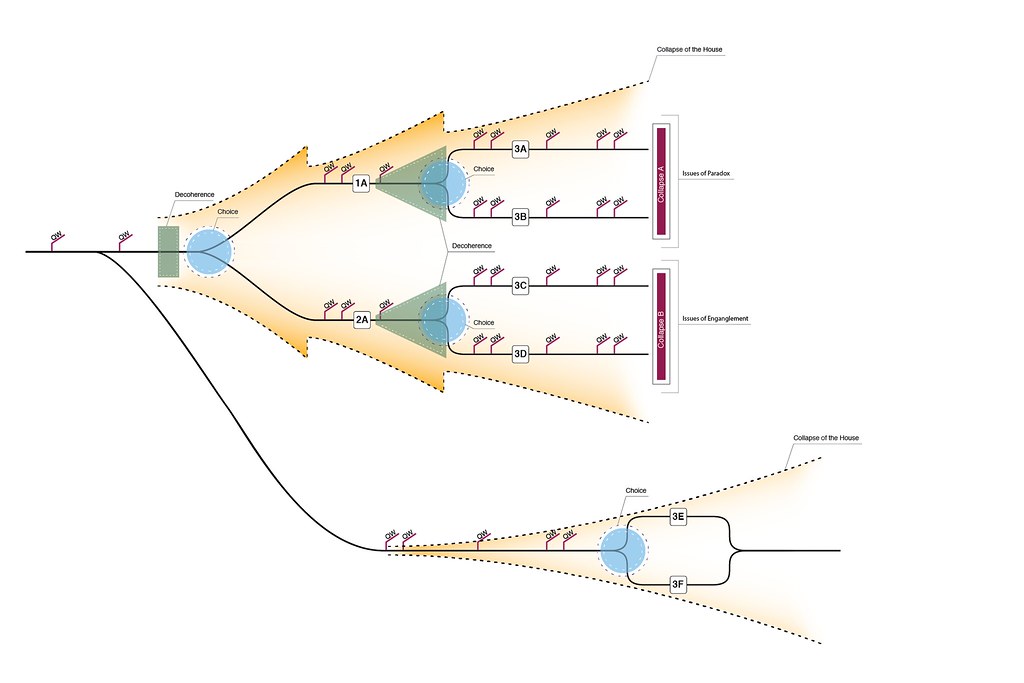
While this was a fine starting point, we also realized that it only giving the audience an opportunity to explore one avenue of possibility in the house felt a little flat. To address that point we discussed a repeated journey through the house in a Ground Hog Day-esque repeated style. Each run of the show will send the audience through the CYOA section three times, allowing them the opportunity to see the other dark corners of the house, and learn more about the strange inhabitants of the home. I did a little bit of map-making and mapped out all of the possible paths for our production; that is, what are all of the possible permutations of the three legged journey through the house. The resulting map means that there are twelve different possible variations for the production. A challenge, to be sure.
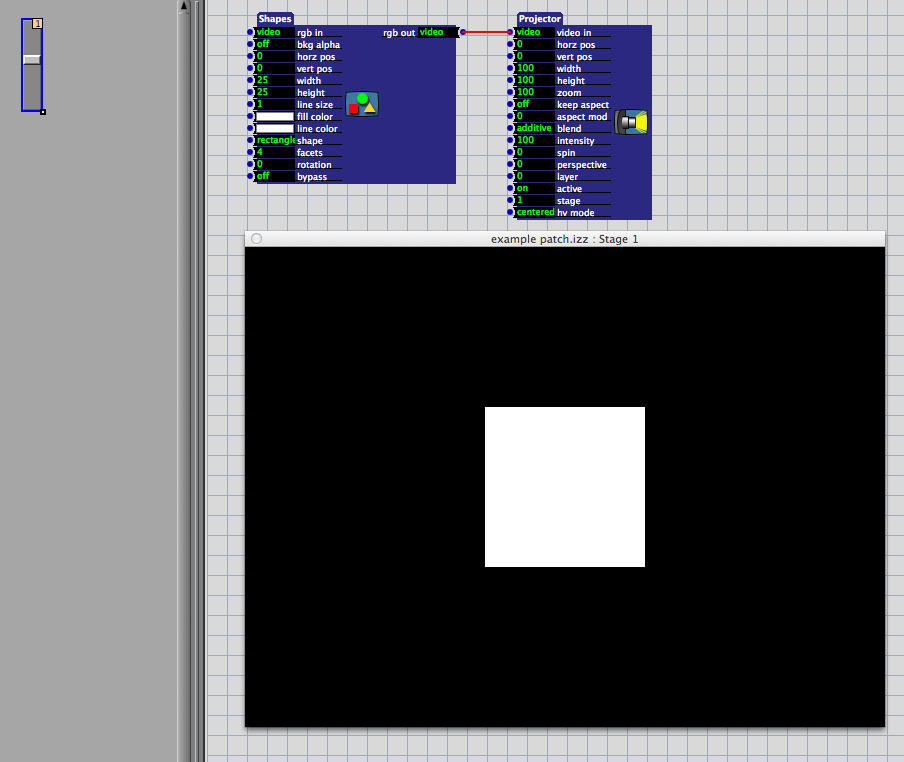
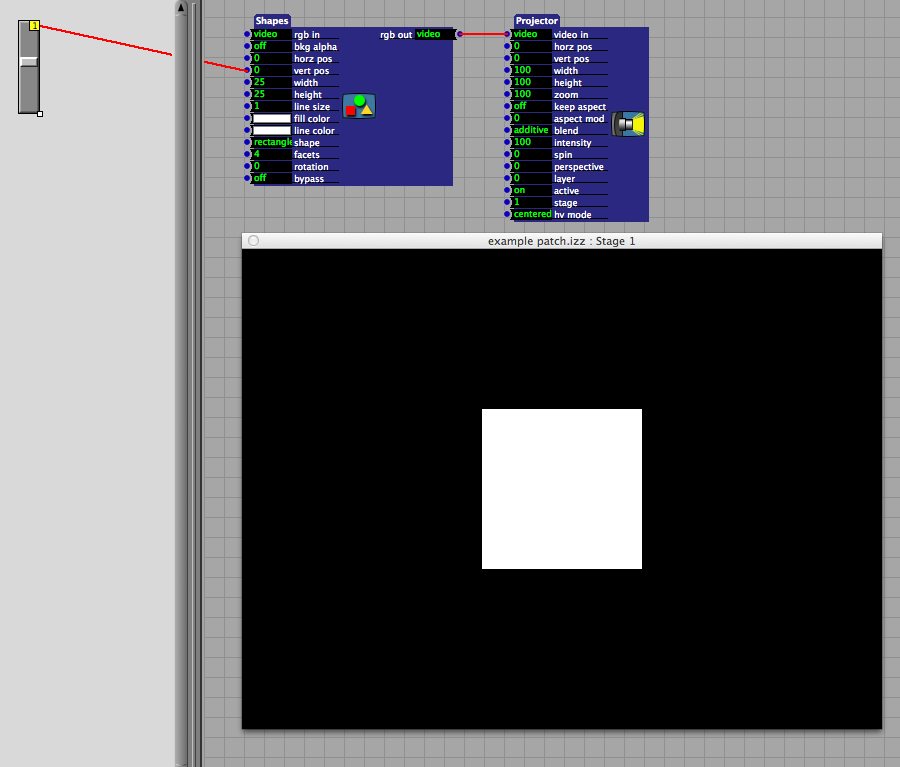
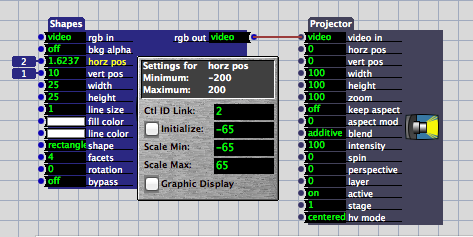
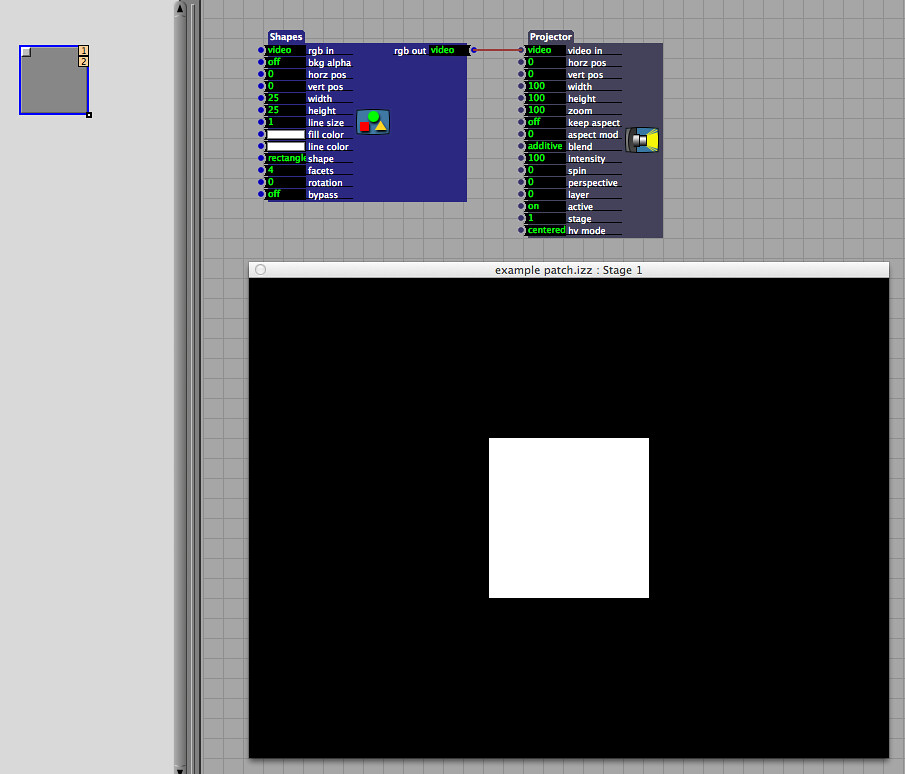
Media and the House
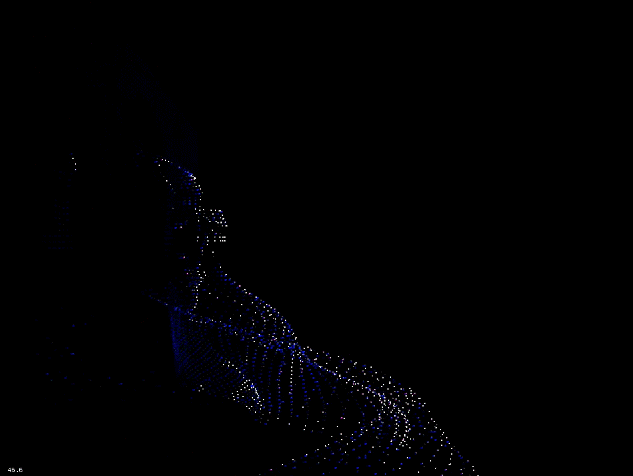
So what's media's role in this production? The house is characterized by it's Escher patterned qualities. Impossible architecture and tricks of lighting and perspective create a place that is uncanny, patterned, but also somehow strangely captivating. Just when it seems like the house has shared all of it's secrets there are little quantum blips and pulses that help us remember that things are somehow not right until ultimately the house collapses.
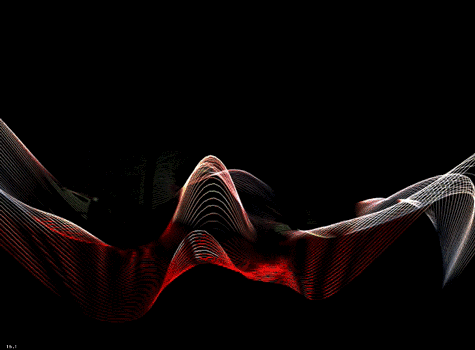
Our host (who spends his/her time slipping between the slices of the various paths the audience tumbles through) is caught as a destabilized field of particles only sometimes coalesced. The culminating scene is set in a place beyond the normal, a world of quantum weirdness - small as the inside of an atom, and vast as the universe itself. it's a world of particles and waves, a tumbling peak inside of the macro and micro realities of our world that are either too big or too small for us to understand on a daily basis.
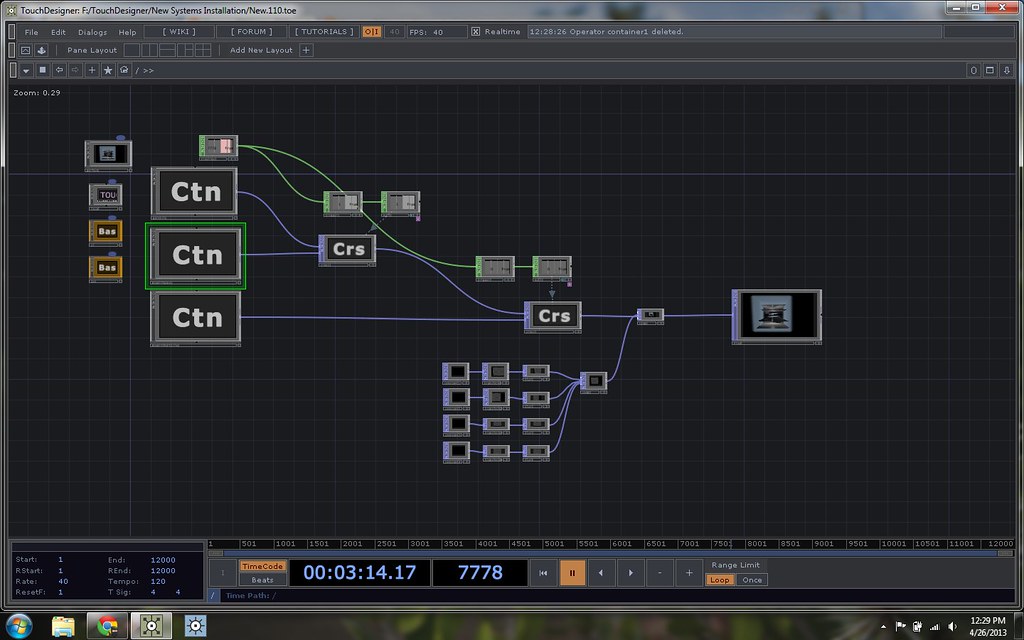
Media's role is to help make these worlds, and to help tell a story grounded in Poe's original, but transformed by a madcap group of graduate students fighting their way out of a their own quantum entanglement.
Monday, May 20, 2013
Isadora | Button Basics
Buttons are very handy interface controls. Before we get started, it’s important to cover a few considerations about how buttons work. When working with a physical button, like an arcade button on a midi controller, the action of pressing the button completes a circuit. When you release the button, you also break the circuit. In Isadora, we can control what happens when we press a button. Specifically, we can control what values are being transmitted when the button isn’t being pressed, when it is being pressed, and how the behaves (does it toggle, or is the signal momentary). Thinking about how a button behaves will help as you start to build an interface, simple or complex.
Let’s start by experimenting with a simple implementation of this process. We’ll create a white rectangle that fills our stage, connect our shape to a projector, and finally use a button to control the intensity of the projector.
Start by creating a new scene, and adding a “Shapes” actor and a “Projector” actor. Connect the shapes’ video outlet to the projector’s video inlet.
Next change the width and height dimensions of the shape to be 100 and 100 respectively. Remember that Isadora doesn’t use pixel values, but instead works in terms percentage. In this case a value of 100 for the hight indicates that the shape should be 100% of the stage’s height, the same applies for the width value of 100.
We should now have a white box that covers the height and width of the stage so that we only see white.
Now we’ll use a button to control a change in the stage from white to black. Remember that in order to start adding control elements we first need to reveal the control panel. You can do this by: selecting it from the drop down menu use Command-Shift-C to see only the control panel or use Control-Shift-S to see a split of the control panel and the programming space. If you've turned on the Grid for your programming space you'll be able to see a distinct difference between the control panel space (on the left) and the programming space (on the right). You'll also notice that with your Control panel active your actor selection bins have been replaced by control panel operators.
With the control panel visible, add a button.
Once you’ve added your button to the control panel, you can change the size of the button by clicking and dragging the small white square on the bottom right of the button.
Next let’s look at the options for the button. We can see what parameters we can control by double clicking on the button. When you do this you should see a pop up window the the following attributes:
- Control Title - what the control is named
- Width - how wide is this control (in pixels)
- Height - how tall is this control (in pixels)
- Font - the font used for this control
- Font Size - self explanitory
- Show Value of Linked Properties - this allows data from the patch itself to feed back into the control panel
- Button Text - the text displayed on the button
- Control ID - the numerical identification number of this contorl
- Off Value - the numeric value sent when the button is in the off position
- On Value - the numeric value sent when the button is in the on position
- Mode (Momentary or Toggle) - the mode for the button. Momentary indicates that the on value is only transmitted while the button is being pressed. Toggle indicates that the values with toggle between on and off values with a click.
- Don’t Send Off - prevents the button from sending the off value
- Invert - inverts the on and off values
There are a few other options here, but they mostly have to deal with the appearance of the button. When you start thinking about how you want your control panel to look to an operator, these last parameters will be very helpful.
For right now let’s leave the default parameters for the button’s options. Next connect the button’s control ID to the inlet on the Projector labeled “intensity.”
As we’re working on the control panel our edit mode is currently enabled which will prevent us from being able to actually click the button with the mouse. To check the controls we have two options:
We can disable edit mode by right clicking on the control panel work space and selecting “Disable Edit Mode” from the contextual menu.
We can use the option key to by-pass the above process.
If you’re doing some extensive testing of your control panel I’d recommend that you disable edit mode. On the other hand, if you’re only testing a single slider or button, I’d recommend using the option key as a much more efficient alternative.
Holding down the option key, you should now be able to click the button in the control panel. You should see the white box flash on, and back off again as you press and release the mouse button. Right now as we click the button we’re sending a value of 100 to the intensity parameter of the Projector actor. This makes the shape opaque only so long as you’re pressing the button.
Double click the button in the control panel and check the box for “Invert.” We’ve now inverted the message being sent from the bottom to the Projector. When you click the button you should now see the opposite. A white screen that flashes black, and then returns to white.
Double click on the button in the control panel, uncheck the box for “Invert.” Change the “Mode” of the button from “Momentary” to “Toggle.” Now as you click the button you should notice that it stays depressed until you click it again. This allows you to toggle between the on and off states of the button.
This, obviously, is only the beginning of how to work with Buttons. You might use a button to control the play back of a movie, what media was on the stage, the position of media on a stage, to jump between scenes, or to change any number of parameters in you parch. Knowing the basics of how buttons behave will help ensure that you can start to build a solid control panel that you can use during a live performance.
A Variety of Approaches | Lessons from Grad School
I'm learning a lot in grad school. Some of the lessons that I'm learning are consistent with my goals and aspirations, some are lessons about realigning my expectations with reality, and some are unexpected discoveries about the nature of a discipline's approach. As an interdisciplinary student my coursework is a purposeful patchwork from multiple departments and schools. This approach means that I'm fortunate to see the world through multiple lenses, and it also means that at times I'm a servant to many masters. In my case, I've seen the approach of the school of Art (in my second semester I took a media and sculpture course), AME (this stands for Arts, Media + Engineering), and the school of Theatre and Film.
In thinking and talking about why we make art/sculpture/programs it seems like I’ve continually run into similar questions. Questions that are rooted in the desire to find meaning, direction, or justification for the art. While one might think of this as more ideological exercise than useful discussion, I think there’s value in the wrestling with questions of motivation and function. “Why” and “for what” help to focus the creator in the process of finding the path for a particular project. To that end I think there are six statements that I’ve heard time and again in talking with other makers, performers, designers, and the like.
Six Statements of focus:
- The act of creation is about
- The aesthetic experience is
- The function of the object/art/program is
- The proof is in
- Value is derived from
- The meaning of the object/art/program
How a discipline finishes the above statements can help to illustrate how their practitioners are encouraged to think of the world, and their contribution to their particular field. As a disclaimer, I don't think think any of the following observations are good or bad. These are my observations about how new and developing artists in these respective fields are encouraged to think about their work, and the process of making their work.
The Artist / Sculptor’s Method
- The act of creation is about is the exploration.
- The aesthetic experience is both in the artist's method and in the viewer's observation.
- The function of the object/art/program is inconsequential; the suggestion of an function is just as powerful.
- The proof is in the critique of the work by an outside artist who is successful.
- Value is derived from the act of creating something new; if the art is successful or not is in some ways inconsequential so long as the artist is being pushed to deepen his/her methods and unique style.
- The meaning of the object/art/program can be explicit, implied, or absent; this is the maker's choice, and they are in no way bound to create a piece that has specific meaning.
In many ways this approach is about concisely making Art with a capital A, while trying to imagine that you're only creating art with ironic italics. There's something of an identity crisis in this approach that almost feeds off the expectation that an audience may willingly accept impenetrable art as a sign that it must be intellectually advanced. Discussions in this environment tend to start from a place of process rather than working backwards from the indented experience. For example, my class often spent more time talking about what we were currently engaged in doing, rather than exploring what we wanted the audience to experience in seeing our work. Here it feels like the answers are hidden, and that part of the artist experience is finding solutions on your own. Ironically there's a very Ryandian kind of perspective to this field. A kind of rugged individualism that covets the secrets to other people's magic tricks. There is also a quiet acceptance that good work may take a lot of time, or it may take very little. Sometimes the artist just has to spend 14 hours sanding, and that's just a part of the work. There is some kind of hipster-zen clarity about the world that can be read as detachment or general disregard for the world.
The Programmer's Method
- The act of creation is about novelty and newness.
- The aesthetic experience is secondary to the methodology in the programming.
- The function of the object/art/program even if inconsequential must be based on logical rules.
- The proof is in the procedural methodology; further, the proof is in the object / program's reliable operation.
- Value is derived from efficiencies and brevity (of the code).
- The meaning of the object/art/program is allowed to be absent, or so abstract as to be invisible.
Depending on the project, the programmer may or may not start with the aesthetic of the finished product. In many cases, before the programmer can start to address how a particular system looks, s/he first must think about how to ensure that the system is consistently producing the intended results. Unlike the Artist's method, the programmer relies on the experience of others who have had similar experiences. Before reinventing the wheel, the programmer first tries to establish how someone else has solved the same problem - what was the most elegant solution requiring the fewest system resources. What trade-offs need to be made in order to ensure consistent, stable operation? More importantly, the programmer lives in a world characterized as a race. Lots of other programmers are all working to solve the same problem, for the same pay-day. "Perfect" comes in a distant second from "done," and while the goal is to always have elegant solutions, having a solution always trumps not having one.
The Media (Theatrical) Designer's Method
- The act of creation is about conveying a message or feeling.
- The aesthetic experience is primary to the work, and should have a purposeful relationship to the world of the production.
- The function of the object/art/program is help tell the story of the production or performance.
- The proof is in observer and the actor's relationship with the media.
- Value is derived from the purposeful connection or disconnection of the art / program / work to the world that it exists inside of the play or performance.
- The meaning of the object/art/program can be abstract or didactic so long as it is purposeful.
Between the artist and the programmer, the media designer sometimes relies on the magic of implied causation (when the actor performs a particular gesture a technician presses a button to cue the shift in the media giving the audience the illusion of a direct relationship between the actor and the media), but may also need to create a system of direct causation (the actor or dancer is actually the impetus for changes in the media). Like the programmer, the media designer is also in a sort of race. The countdown to opening night is always an element of the design process. While "done" still trumps "perfect" this question takes on a different kind of dynamic for the media designer. "Done" might be something that happens during the second or third night of tech, and ideally "perfect" happens before opening.
Friday, May 17, 2013
Isadora | Slider Basics
One of the most exciting (and also most challenging) parts of working with Isadora is thinking about how an operator is going to use your patch during a show. ASU's program focuses on the importance of programming a show with the expectation that the person running your system may, or may not, have much experience. During the tech rehearsal process one of the Media Designer's responsibilities is to train the operator with basic operation and trouble shooting techniques.
While there are a wide variety of methods for controlling your system I want to take a moment to cover how you can use the Control Panel features of Isadora to create a simple custom interface. I'm also going to take a moment to talk about the different kinds of controls, how they work, and things you want to keep in mind as you're using them.
To get started, there are few different ways to reveal the control panel. You can: select it from the drop down menu use Command-Shift-C to see only the control panel or use Control-Shift-S to see a split of the control panel and the programming space. If you've turned on the Grid for your programming space you'll be able to see a distinct difference between the control panel space (on the left) and the programming space (on the right). You'll also notice that with your Control panel active your actor selection bins have been replaced by control panel operators.
As you create new scenes, Isadora will start by connecting all scenes to the same control panel. There are a few different schools of thoughts in terms of best practice in the use of control panels. Using a single control panel for every scene means only building a single interface. As long as you’re only dealing with a limited number of simple cues this is a fine direction to head, and may be the easiest method in terms of programming. This approach can, however, get complicated very quickly if you’re triggering more than one actor per scene. In this scenario the programmer could loose track of where a button or slider is connected. This might cause unexpected playback results or could just be a source of headaches. For more complicated play-back situations, you may instead elect to have separate control panels for each scene. Depending on your programming needs this may be the best way to ensure that your controls are only linked to a single scene.
To accomplish this, you’ll need to split your control panel. Isadora gives you several visual cues to determine how a scene and control panel are linked. When you glance at your scene list you’ll notice that the bar underneath is either continuous (a single control panel) or broken (a split control panel).
To split the control panel click between the two scenes that you wish you separate. When you see your cursor separating the two scenes right click to get a contextual menu with the option to split the control panel. You should now see that the line between the two scenes is now broken.
Let's start by looking at a simple slider. To add a slider to your control panel start by double clicking in the control panel work space. Next type in “slider” and select it when it appears in the drop down menu.
It’s important to note that there is a difference between the 2D slider, and the regular slider. For now, we just want the “slider” control. We can learn a little more about what our slider is doing by double clicking on it.
You should see a pop up window with lots of information about our slider:
Let’s start by working with the default values for the slider and to see how this is communicating with the patch itself.
First, we will add a trigger value to the programming space so we can see how values are transferred from the control panel to the programming environment.
As we’re working on the control panel our edit mode is currently enabled which will prevent us from being able to actually move the slider with the mouse. To check the controls we have two options:
You’ll also notice that the output from the trigger value has not changed. This is because we’re only adjusting the value, but not activating the trigger. Let’s activate the trigger at the same time we’re moving the slider.
To do this we attach the Control ID to the trigger inlet on the Trigger Value Actor. This will ensure that the actor triggers at the same time that the value is changed. Now when we move the the slider we can see that the output value also changes.
Now that we know how to send slider data to a trigger value we can now look at something a little more interesting. We are going to start by adding a shape actor and connecting that to a projector actor.
Next connect your vertical slider to the “vert pos” (Vertical Position) inlet on the shapes actor.
Create a new slider in the control panel. Grab the small box on the bottom right corner and drag the slider to the right until you have created a horizontal slider.
Connect your horizontal slider to the “hora pos” (Horizontal Position) inlet on the shapes actor.
Next we need to adjust the scaling values of the shape actor. Actor’s inlets and outlets can often be scaled to a set range. In order to properly use our slider we’ll need to adjust the inlet scaled values on the Shapes Actor. To do this click on the name of the attribute whose scaled values you’d like to adjust. Start by clicking on “hora pos.” We can see in the pop-up menu that the minimum value is currently set to −200, and the maximum value is set to 200. These values are too high.
Isadora uses a coordinate system that assumes that the middle of the stage is the origin 0,0. Further, Isadora thinks in terms of percentages rather than pixels. In the case of our horizontal slider, a positive value of 50 represents half of the total stage length which puts us at the right most edge of the stage. In the case of shapes it’s also important to note that the shape’s position is relative to it’s center. A positive value of 50 still leaves half of our shape on the screen, no matter the dimensions of the shape.
Set the scaled values of the horizontal position to −65 and 65. Now when we drag our slider (remember to hold down the option key) we are able to move our box from all the way off the stage on the left to all the way off the stage on the right.
Next we’ll click okay, and link Control ID 1 (the X control) to the “horz pos” inlet on the Shapes Actor. Now link the Control ID 2 (the Y control) to the “vert pos” inlet on the Shapes Actor. Check to make sure that the horizontal and vertical inlets on the Shapes Actor are properly scaled (last time we set them to −65 and 65).
Now the single 2D slider behaves in the same way as the two sliders we set-up in the exercise above.
This, obviously, is only the beginning of how to work with Sliders and 2D Sliders. You might use a slider to control the playback position of a movie, or the position of a movie on the stage. You might use a slider to control position, zoom, rotation, width, height, really just about any kind of numerical attribute for an actor. The key things to keep in mind in this process are:
While there are a wide variety of methods for controlling your system I want to take a moment to cover how you can use the Control Panel features of Isadora to create a simple custom interface. I'm also going to take a moment to talk about the different kinds of controls, how they work, and things you want to keep in mind as you're using them.
To get started, there are few different ways to reveal the control panel. You can: select it from the drop down menu use Command-Shift-C to see only the control panel or use Control-Shift-S to see a split of the control panel and the programming space. If you've turned on the Grid for your programming space you'll be able to see a distinct difference between the control panel space (on the left) and the programming space (on the right). You'll also notice that with your Control panel active your actor selection bins have been replaced by control panel operators.
As you create new scenes, Isadora will start by connecting all scenes to the same control panel. There are a few different schools of thoughts in terms of best practice in the use of control panels. Using a single control panel for every scene means only building a single interface. As long as you’re only dealing with a limited number of simple cues this is a fine direction to head, and may be the easiest method in terms of programming. This approach can, however, get complicated very quickly if you’re triggering more than one actor per scene. In this scenario the programmer could loose track of where a button or slider is connected. This might cause unexpected playback results or could just be a source of headaches. For more complicated play-back situations, you may instead elect to have separate control panels for each scene. Depending on your programming needs this may be the best way to ensure that your controls are only linked to a single scene.
To accomplish this, you’ll need to split your control panel. Isadora gives you several visual cues to determine how a scene and control panel are linked. When you glance at your scene list you’ll notice that the bar underneath is either continuous (a single control panel) or broken (a split control panel).
To split the control panel click between the two scenes that you wish you separate. When you see your cursor separating the two scenes right click to get a contextual menu with the option to split the control panel. You should now see that the line between the two scenes is now broken.
Let's start by looking at a simple slider. To add a slider to your control panel start by double clicking in the control panel work space. Next type in “slider” and select it when it appears in the drop down menu.
It’s important to note that there is a difference between the 2D slider, and the regular slider. For now, we just want the “slider” control. We can learn a little more about what our slider is doing by double clicking on it.
You should see a pop up window with lots of information about our slider:
- Control Title - what this control is named
- Width - how wide is this control (in pixels)
- Height - how tall is this control (in pixels)
- Font - what’s the font used for this control
- Font Size - self explanatory
- Show Value of Linked Properties - this allows data from the patch itself to feed back into the control panel.
As a note, for this to work properly, you’ll also need to enable the “Display Value” check-box(a big thank you to Matthew Haber for catching my error here) - Control ID - the numerical identification number of this control
- Minimum - Slider’s work on a principal that at the bottom, or left, position this control switch will send the number that’s indicated in this box.
- Maximum - Slider’s work on a principal that at the top, or right, position this control switch will send the number that’s indicated in this box.
- Step - The counting increments for this control.
- Display Value - Shows the current value being sent in the control panel itself.
- Display Format - The number of floating points displayed.
- Color - The color of the inside of the slider.
Let’s start by working with the default values for the slider and to see how this is communicating with the patch itself.
First, we will add a trigger value to the programming space so we can see how values are transferred from the control panel to the programming environment.
Next we can connect the Control ID from the control panel to the Value inlet not he Trigger Value Actor. We can do this by clicking on the Control ID, and dragging the red line to the “value” input.
You should now see a number next to the value input that corresponds to the slider’s control ID.
As we’re working on the control panel our edit mode is currently enabled which will prevent us from being able to actually move the slider with the mouse. To check the controls we have two options:
- We can disable edit mode by right clicking on the control panel work space and selecting “Disable Edit Mode” from the contextual menu.
- We can use the option key to by-pass the above process.
If you’re doing some extensive testing of your control panel I’d recommend that you disable edit mode. On the other hand, if you’re only testing a single slider or button, I’d recommend using the option key as a much more efficient alternative.
Holding down the option key, you should now be able to move the slider in the control panel. You’ll notice that the value linked to the slider also changes.
You’ll also notice that the output from the trigger value has not changed. This is because we’re only adjusting the value, but not activating the trigger. Let’s activate the trigger at the same time we’re moving the slider.
To do this we attach the Control ID to the trigger inlet on the Trigger Value Actor. This will ensure that the actor triggers at the same time that the value is changed. Now when we move the the slider we can see that the output value also changes.
Now that we know how to send slider data to a trigger value we can now look at something a little more interesting. We are going to start by adding a shape actor and connecting that to a projector actor.
Next connect your vertical slider to the “vert pos” (Vertical Position) inlet on the shapes actor.
Create a new slider in the control panel. Grab the small box on the bottom right corner and drag the slider to the right until you have created a horizontal slider.
Connect your horizontal slider to the “hora pos” (Horizontal Position) inlet on the shapes actor.
Next we need to adjust the scaling values of the shape actor. Actor’s inlets and outlets can often be scaled to a set range. In order to properly use our slider we’ll need to adjust the inlet scaled values on the Shapes Actor. To do this click on the name of the attribute whose scaled values you’d like to adjust. Start by clicking on “hora pos.” We can see in the pop-up menu that the minimum value is currently set to −200, and the maximum value is set to 200. These values are too high.
Isadora uses a coordinate system that assumes that the middle of the stage is the origin 0,0. Further, Isadora thinks in terms of percentages rather than pixels. In the case of our horizontal slider, a positive value of 50 represents half of the total stage length which puts us at the right most edge of the stage. In the case of shapes it’s also important to note that the shape’s position is relative to it’s center. A positive value of 50 still leaves half of our shape on the screen, no matter the dimensions of the shape.
Set the scaled values of the horizontal position to −65 and 65. Now when we drag our slider (remember to hold down the option key) we are able to move our box from all the way off the stage on the left to all the way off the stage on the right.
Another type of slider that might be self in this type of situation is the 2D slider. Create a new scene and split the control panel so we can see how this input control works. In the new scene add a Shapes Actor and a Projector Actor, and connect them. Now open add a 2D slider to the control panel.
Double click on the 2D slider so you can see a little more about how this particular control input works. Similar to the “slider” control you can see that you can title the slider, adjust the width, height, font, and so on. You’ll notice that there’s a X Control ID and a Y Control ID.
Next we’ll click okay, and link Control ID 1 (the X control) to the “horz pos” inlet on the Shapes Actor. Now link the Control ID 2 (the Y control) to the “vert pos” inlet on the Shapes Actor. Check to make sure that the horizontal and vertical inlets on the Shapes Actor are properly scaled (last time we set them to −65 and 65).
Now the single 2D slider behaves in the same way as the two sliders we set-up in the exercise above.
This, obviously, is only the beginning of how to work with Sliders and 2D Sliders. You might use a slider to control the playback position of a movie, or the position of a movie on the stage. You might use a slider to control position, zoom, rotation, width, height, really just about any kind of numerical attribute for an actor. The key things to keep in mind in this process are:
- Knowing the range of values that your slider is transmitting
- Knowing the scaled range of values that your actor is transposing values to
- Knowing control ID
- Knowing how to connect your control panel items to Actors in your patch
Wednesday, May 15, 2013
Media Design | Building Projection Mapping
One of the courses I’m taking in my first year at ASU is a course called Media Design Applications. This course is centered around the use of various media design techniques in specific relation to their application in a theatrical setting. One of the techniques that we discussed in class is architectural projection mapping. This form has quickly become popular for forcing perspective, and opportunity for complex illusion. The underling principal of projection mapping is to highlight and take advantage of physical from in order to create the illusion that the entire surface is, itself, a screen. There are a variety of techniques to achieve this illusion, some based entirely in software and others based in the process of generating the artwork itself. This is an essential and powerful tool for the media designer as it opens up a wide range of possibilities for the creation of theatrical illusion. Before I start to talk about the process, here’s the project description:
Project Description:
Component 2 – Geometry, Surface and Illusion
Unfortunately - or possibly fortunately - media designers in the theatre get a nice, rectangular, white screen to shoot at from a perpendicular, on-center angle. In this section, we will explore methods for dealing with odd angles, weird shapes, and non-ideal surfaces, as well as exploring special effects that are possible through the right marriage of projection, surface and angle. For this project, you may choose a building, sculpture or other built object in the ASU environment, then map its geometry using the techniques shown in class and create content utilizing that geometry to best effect. Final presentations of this project will be in the evening on campus.
I started by this process by first scouting a location. After wandering around campus several times I one of the buildings that I kept coming back to was a energy solutions building by a company called NRG. One of the larger draws of this building happens to be the location. Positioned directly across from one of the campus dormitories it seemed like an ideal location that would have a built-in audience. While there’s no guarantee that there will be many students left on campus at this point, it never hurts to plan for the best.
The face of the building that points towards the dormitories is comprised of abstract raised polygons arranged in narrow panels. These panels come in two varieties creating a geometric and modern look for the building. One of the productions I’m working on next year has several design elements that are grounded in abstract geometric worlds, and this seemed like a prime opportunity to continue exploring what kind of animation works well in this idiom.
In the Asset or In the System
The debate that is often central to this kind of work is centered around an approach that values building a system (or program) for creating the aesthetic, or to instead create the work as fixed media artifacts. In other words, do you build a something that is at it's core flexible and extendable (though problematic, finicky, and unabashedly high maintenance) or do you build something rigid and fixed (though highly reliable, hardware independent, and reproducible)? Different artists prefer different methods, and there are many who argue that one is obviously better than the other. The truth of the matter, however, is that in most cases the right approach is really a function of multiple parameters: who's the client, what's the venue, what's the production schedule, what resources are available, is the project interactive, and so on. The theoretical debate here is truly interesting, and in some sense calls into question what the skill set is most appropriate for the artist who intends on pursuing this practice. The print analogy might be, do you focus on designing within the limitations of the tools that you have or do you commit to building a better printing press so that you can realize the design exists only as an abstract thought?
Recent Arizona State MFA graduate Boyd Branch shared these thoughts about this very topic:
I don't know if there is much of a debate between system building and design for production. Quite simply- every production demands aesthetics. The aesthetic is always the most important. The system is only useful in as much as it generates the appropriate aesthetic experience. It doesn't matter how reliable, interesting, or functional a system is if it isn't supplying an aesthetic relevant to production. A "flexible and extendable " system is only useful if the aesthetic of flexibility and extendibility is ostensibly the the most relevant aesthetic. Interactivity is an aesthetic choice for performance and only relevant when ontology or autonomy are the dramatic themes. For theatre in particular, the system inevitably becomes a character, and unless that character is well defined dramatically, it has no business inserting itself into production.
The debate if any is internal for the designer and presented as a range of options for the producer/director. That debate is a negotiation between time and resources. A designer may be able to envision a system that can achieve an effect- but without sufficient experience with that system and the ability to provide a significant degree of reliability, such a system should not be proposed without articulating how the dramatic themes will inevitably shift to questions about technology.
Sometimes an aesthetic is demanded that requires experimentation on the part of the designer. A designer has to be knowledgable enough about their skill set to know how to explain the cost involved in achieving that aesthetic. And if that cost is reliability than it is incumbent on the designer to iterate that cost and explain how the production will hinge on the unpredictability of that system.
An unreliable system , however, is frankly rarely good for any production unless unreliability is the theme. If a production requires a particular aesthetic experience that seems to be only achievable with the creation of a new tool, then it must be recognized that that tool and the presence of that tool embody the major dramatic themes of production.
Avant garde theatre is one of the best environments for exploring the aesthetics of system building - but it is also the theatre that has the smallest budgets...
For this particular assignment we were charged with the approach of building everything in the asset itself. That is, building a fixed piece of video artwork that could then be deformed and adjusted with playback software (MadMapper).
Given the nature of this assignment it made sense that Adobe After Effects would be the tool of choice. AE is an essential tool for any media designer, especially as there are times when pre-rendered media is simply the best place to start. I spent a lot of time thinking about the direction that I wanted to move in terms of overall aesthetic for this particular assignment, and I found that again I was thinking about abstract geometric worlds, and the use of lighting in 3D environments in order to explore some of those ideas. As I've been thinking about the production I'm working on the in the fall it's seemed increasingly important to take advantage of open ended assignments in order to explore the ideas and directions that feel right for that show. I'm really beginning to see that the cornerstone of successful independent learning comes from deliberate planning - what can I explore now that will help me on the next project? To that end, what kind of work do I want to be making in two years, and how can I set myself to be successful? Planning and scheduling may be one of the most under-stressed skills of any professional, and I certainly think that applies to artists.
In thinking about abstract animation with After Effects I knew that I wanted to explore four different visual worlds: flat abstract art, lines and movement, 3D lighting and the illusion of perspective, and glitch art. Each of these has it's own appeal, and each also has a place in the work that I'm thinking about for the fall.
Worlds Apart
Flat and abstract
In thinking about making flat abstract art I started, as I typically do, by doing lots of visual research. One of the more interesting effects that I stumbled on was achieved by using AE's radio waves plug-in in conjunction with a keyframed mask. YouTube user MotionDesignCommun has a great tutorial about how to achieve these particular visual effect. Overall the media takes on a smoke-like morphing kind of look that's both captivating and graceful. A quick warning about this effect. This is definitely a render hog. The 30 seconds of this effect used for this project took nearly 7 hours to render. As a disclaimer I did render the video at a projector native 1920 x 1200. All of that aside, this effect was a great way to explore using morphing masks in a way that felt far more organic that I would have originally thought about.
Lines and Flat Movement
I also wanted to play with the traditional big-building projection mapping effect of drawn-in lines and moving shapes. In hindsight I think the effect of the lines drawing in took too long, and ultimately lost some of the visual impact that I was looking for. I also explored playing with transforming shapes here, and that actually was far more interesting and happened too quickly. My approach for this effect was largely centered around the use of masks in AE. Masks, layers, and encapsulated effects were really what drove this particular exploration. Ultimately I think spending more time to write an expression to generate the kind of look that I'm after would be a better use of my time. If I were to go back I think I could successfully craft the write formula to make the process of creating this animation easier, but it really took the effort of creating the first round of animation to help me find that place. One of the hard, but important lessons, that I've learned from programming is that sometimes you simply have to do something the hard way / long way a couple of times so that you really understand the process and procedural steps. Once you have a solid idea of what you're trying to make, it becomes much easier to write the expression as an easier way to achieve the effect you're after.
3D Lighting and the illusion of Perspective
Another projection designer's magic trick that I wanted to play with was the idea of creating perspective with digital lighting of a 3D environment. By replicating the geometry that you're projecting onto, you the designer can create interesting illusions that seem impossible. In my case I started in After Effects by positing planes in 3D space at steep angles, and then masking them so that they appeared to mimic the geometry of the actual building. To make this easier for myself, I worked in a single column at a time. I then pre-composed individual columns so that they could easily be duplicated. The duplicated columns only needed small changes rather than requiring me to build each of the 86 triangles from scratch.
Glitch Art a la After Effects
In another course I took this semester a group of students focused on using glitch art as a base for some of their artistic exploration. While they specifically focused on the alteration of i-frames and p-frames, I wanted to look at the kind of effect that can be purposefully created in AE, and then later modified. YouTube user VinhSon Nguyen has a great tutorial on creating a simple glitch effect in AE. More interesting than the act of making his glitch effect, is his approach. Rather than just adding in adjustment layers and making direct changes. Nguyen instead focuses on how to connect the attributes of a your effect to null objects, essentially making an effect that can be universally applied to any kind of artwork that you want to drop into your comp. This approach to working in AE was interesting as it seemed to start from the assumption that the effect one is making is something that should be easily applied to other works.
Put it all Together
With each section as its own comp the last step in the process was to create a final comp that transitioned between the different worlds, applied some global lighting looks and effects, and added a mask to prevent unwanted projector spill. This was also a great place to do some fine tuning, and to see how the different comps transitioned into one another.
Resources
AE: Create a Glitch Effect
AE: Morphing by MotionDesignCommun
Creative Cow - Creating a 3D Cube
Sunday, April 28, 2013
Isadora | Network Control
For an upcoming show one of the many problems that I'll need to solve is how to work with multiple machines and multiple operating systems over a network. My current plan for addressing the needs of this production will be to use one machine to drive the interactive media, and then to slave two computers for cued media playback. This will allow me to distribute the media playback over several machines while driving the whole system from a single machine. My current plan is to use one Mac Pro to work with live data while slaving two Windows' 7 PCs for traditionally cued media playback. The Mac Pro will drive a Barco, while the PC's each drive a Sanyo projector each. This should give me the best of both worlds in some respects. Distributed playback, similar to WatchOut's approach to media playback, while also allowing for more complex visual manipulation of live-captured video.
To make all of this work, however, it's important to address how to get two different machines running Isadora on two different operating systems to talk with one another. To accomplish this I'm going to use an OSC Transmit actor on the Master machine, and an OSC listener on the slaved machines.
On the Master machine the set-up looks like this:
You can, of course, do much more complicated things with this set-up all depending on your programming or play-back needs.
To make all of this work, however, it's important to address how to get two different machines running Isadora on two different operating systems to talk with one another. To accomplish this I'm going to use an OSC Transmit actor on the Master machine, and an OSC listener on the slaved machines.
On the Master machine the set-up looks like this:
Trigger Value - OSC Transmit
The transmit actor needs the IP address of the slaved machines, as well as a port to broadcast to. The setup below is for talking to just one other machine. In my final setup I'll create a specialized user actor that holds two OSC Transmit actors (one for each machine) that can be copied into each scene.
On the Slaved machines the setup takes two additional steps. First off it's important to determine what port you want to receive messages from. You can do that by going to Isadora Preferences and selecting the Midi/Net tab. Here you can specify what port you want Isadora to listen to. At this point it's important to catch the data stream. You can do this by oping up the Communications tab and selecting Stream Setup. From here make sure that you select "Open Sound Control" and click the box "Auto-Detect Input." At this point you should see the Master Machine broadcasting with a channel name an address, and a data stream. Once this is setup the Actor patch for receive messages over the network looks like this:
OSC Listener - Whatever Actor you Want
In my case I'll largely use just jump++ actors to transition between scenes, each with their own movie.
Subscribe to:
Posts (Atom)